

If you’ve been active on LinkedIn and Instagram lately, then you know carousel posts have become H-O-T.
Before writing this post, I skimmed my feed, and 30% of all the organic posts were carousel posts.
Can you guess the posts that also had the most engagement?
Yep. Carousel posts.
At this point, it’s pretty obvious that LinkedIn is trending towards more visual content. Visual content has become an engagement MAGNET on what used to be a boring text-heavy platform.
Carousel posts also inherently take more time and effort to make. So I’ve been struggling to dedicate the time to invest in them until I realized…
Why don’t we repurpose our client’s blog posts into carousel posts? Which is exactly what this post is all about.
Table of contents:
- Curate and Create Your Carousel Content
- Design Your Carousel Page Templates
- Format Your Content to Your Templates
- Prep Your Post for Publishing
- Ready to Start Distributing Your Content on LinkedIn?
Create Your Carousel Content
There are 2 different ways you can turn blog posts into carousel posts.
Way #1: Summarize your blog post into a carousel
This is when you condense your long-form blog post into a summary that’s in carousel format.
Here’s how to get started:
Step #1: Extract the H1 and H2s of a blog post. Make them the title and subtitles for each carousel page.
So it’ll look like this:
- Page 1: [H1]
- Page 2: [H2]
- Page 3: [H2]
- And so on…
Step #2: Make the H1 the title on page 1. Rewrite the title to invoke curiosity in the reader. This is essentially the hook or “intro.”
Step #3: Copy and paste the main points of each H2 from the blog post under each carousel page subtitle.
Step #4: Condense the main points into 1-5 short and clear sentences to optimize them for a social media audience.
Remember: The attention span of someone on social media is only a couple of seconds.
Step #5: Reuse graphics from the blog for the carousel. You want the graphics to help explain the idea that you wrote about. You may need to create graphics if you don’t have any already.
Step #6: Make the last page your CTA. Here are some CTAs to consider depending on the topic:
- Follow for more (for brand awareness posts)
- Sign up for an email list (For educational posts)
- Read the full blog post (For educational posts)
- Sign up for a trial or demo (For product-focused posts)
Here’s what it’ll look like when you’re done:
Way #2: Turn a section into an actionable carousel
This is when you take a specific H2 (or sometimes H3) in a blog post and turn it into an actionable carousel.
Here’s how to do it:
Step #1: Make the topic of your H2 the title on page 1. Rewrite the title to hook the reader.
So:
Page 1: [your H2 of choice]
Step #2: Give any H3s a dedicated carousel page. Make sure each page subtitle flows like a conversation.
Step #3: Create a page for each sequential step in the process of what the blog section explains.
Step #4: Write 1-5 actionable sentences for each step. Rewrite the blog section you’re repurposing to be concise and flow like a social media post (write it as if you were talking to a friend).
Step #5: Add descriptive visuals in the form of graphics or screenshots to explain the idea on each page. Not every page needs a visual, but the more, the better.
Step #6: Make the last page your CTA. Here are some CTAs to consider depending on the topic:
- Follow for more (for brand awareness posts)
- Sign up for an email list (For educational posts)
- Read the full blog post (For educational posts)
- Sign up for a trial or demo (For product-focused posts)
Here’s what this section looks like as a carousel:
Design Your Carousel Page Templates
You could create a new design for each carousel. But is that necessary? Not at all.
It’s much easier and cost-efficient to create template pages for your carousels so you can reuse them in the future.
I highly recommend working with a graphic designer to create aesthetic page templates that match your brand.
Here are the steps we took to create our templates at Stat Digital:
- Create 10+ different page templates
- Create different variations of the last page for your different CTAs
- Use your brand colors and fonts.
- Make sure the design on any templates doesn’t overpower the text.
- Keep the design discreet. No one likes an overly busy design
- Always stick to a single style so that your posts become recognizable.
Here are some examples of our templates:
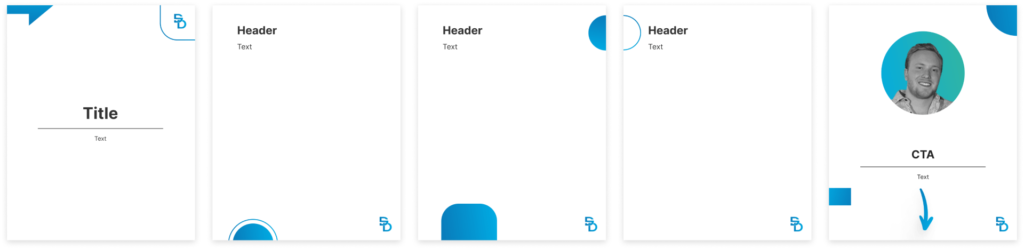
Format Your Content onto Your Carousel Template
We usually have our designer add text and graphics to the carousel templates to make the finished product.
You could do this yourself, but personally, I trust our professional designer’s artistic mind more than my own.
Here are some design tips to remember when formatting the content:
- Use contrasting colors to make it easy to read your text.
- Don’t add a lot of text on one page.
- Space content out across more pages if there’s too much text on one page.
- The text should be large enough to be easy to read.
- Rewrite the title, subtitles, and text to flow like a social media post (so make it conversational).
- Sometimes it’s better to use visual diagrams or illustrations instead of text (people prefer to see over only being able to read).
Prep Your Post for Publishing on LinkedIn
You made an awesome carousel, but remember the fundamentals of social media, and in this case, LinkedIn.
You still want to have a hook in your caption and make sure your content is accessible.
Content accessibility is often overlooked, but as a content marketer, it should be a moral duty to ensure your content is accessible to as many people as possible, regardless of disability.
Here’s a checklist of some other things to square away before hitting publish to ensure your reach is as wide as possible:
- Write a hook within 3 lines (only 3 lines are visible before a reader has to click “see more” for posts with media attached).
- Add 3 relevant hashtags that target your ideal audience.
- Add a descriptive title to your document.
- For the rest of the text caption for the post, add the text from the carousel post (which you can pretty much copy and paste).
Tip: For the descriptive title and caption, consider people who can only access LinkedIn posts via text-to-speech apps. So try to have all of the content that’s in the carousel also be in written form as the caption.
Ready to Start Distributing Your Content on LinkedIn?
Without the right team in place, creating your blog content and distributing it properly over social media isn’t going to get done.
We get it.
As a founder or in-house marketer, your time is limited, despite the long list of things you know you must do to help your company reach its full potential.
Optimizing your content for SEO is great for getting compounding long-term results and decreasing your CAC, but it’s only one slice of the pie.
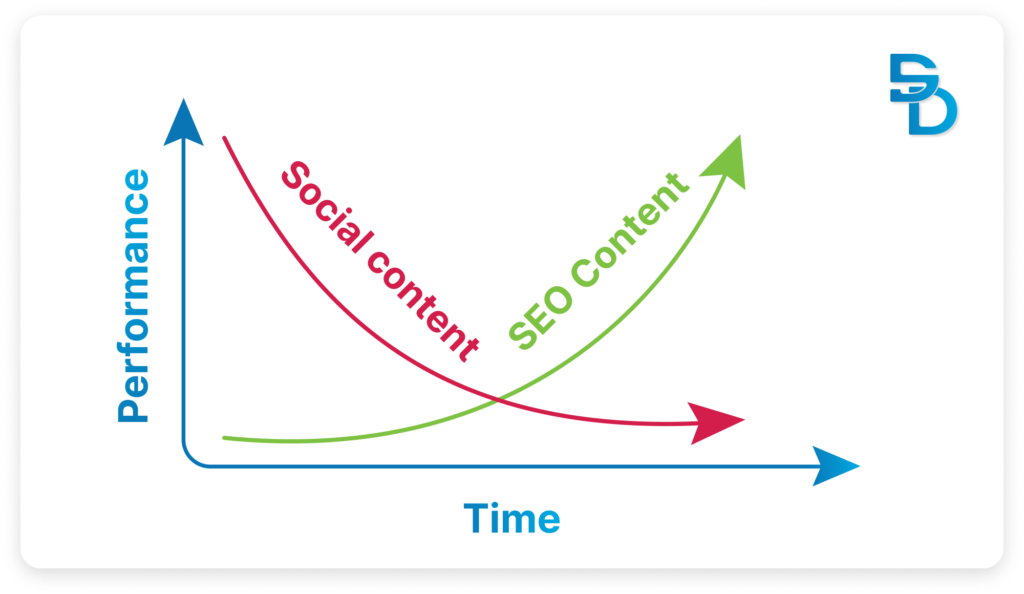
Repurposing that content for social media fills the gap, allowing you to get traffic to your audience now while your SEO content ramps up.
Want your social, search, and email content strategy taken off your hands and done right? Book a discovery meeting with us today. We’ll be happy to get you going in the right direction.